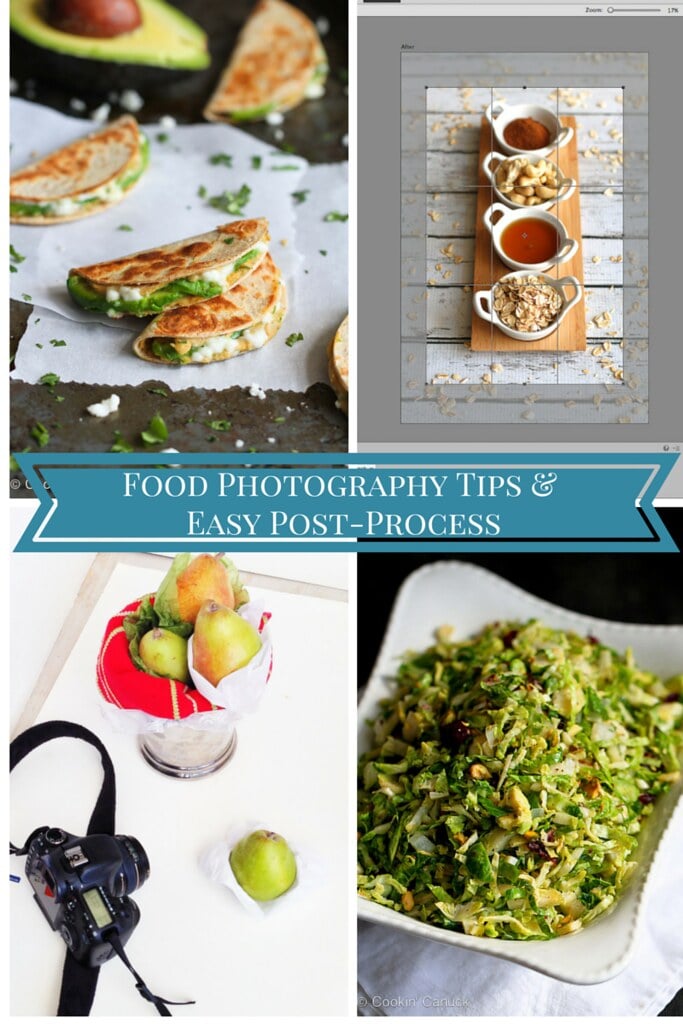
Pick up your camera and get ready to snap away. Here are some of my best food photography tips, plus an easy post-process before and after. Thank you to Adobe for helping me share this post with you.
Whether you are a food blogger or a home cook hoping to capture your favorite dishes in photos, it's always helpful to have a few go-to tips to make those images as beautiful as the dishes themselves. You may be capturing your family's traditional Christmas cookies or snapping a photo at your favorite restaurant's holiday brunch.
While you can get really fancy with the best cameras and lenses, and the most complicated post-processing acrobatics, there are some really simple steps that you can take that don't require a lot of expertise or time to make your food photos look fantastic. Whether you are using a full frame camera or an iPhone, you can capture some wonderful images.
I have been exploring all of the tools in Adobe Photoshop Elements, which is the most powerful post-processing software available in its price range. At the end of this post, I'll show you how I made significant changes to one of my photos with a few simple steps.
#1: Natural Lighting
If you are new to food photography, I'm going to say something that may surprise you….Step away from the built-in flash and move away from the overhead lights! The built-in flash , while well-meaning, can produce less than appetizing effects, while overhead lighting casts a yellowish glow on the food.
Here is one of my earliest photos on my blog, taken under my overhead kitchen light.
Not appetizing!

Using natural light is easier than it seems. Do a quick scouting session around your house and find the window that is letting in the best natural light at that time of day. Take the plate of food and set it near, but not right beside (you don't want the lighting to be too harsh), the window. Avoid having the sun shine directly onto your food. Rather, set up the the dish in the shaded part of the room that is closest to the window. If there isn't an attractive surface to place the food on, bring along a wood cutting board for a background.
Play around with your angles and snap a few test photos. Move both the food and yourself to change how the light is hitting the food. Perhaps it looks best when the light is coming in from the side, or maybe you want to catch the light shining through a glass from the back.

#2: Use Garnishes & Fabrics
Just a little sprinkle of parsley, a leaf of basil or a colorful napkin is sometimes all that's needed to take a colorless photo from boring to beautiful. This is particularly true when photographing fall or winter comfort foods - in other words, the brown stuff.
This lentil stew has fantastic flavor, but when it comes to appearance, it is the plain Jane girl sitting in the corner. However, it's nothing that a dash of minced parsley and a bright napkin can't fix.
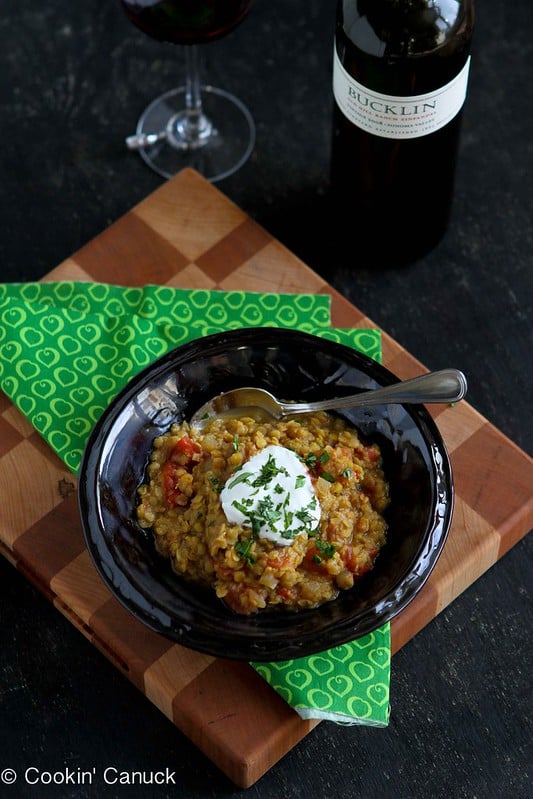
Curry Lentil Stew with Tomatoes
#3: Try different angles
There is no set rule about which angle to shoot from. Mix it up and keep things interesting. Perhaps you find that you can capture the scene best from the top down. Maybe that holiday cocktail looks its sipp-able best when shot at eye-level. Or perhaps you are most drawn to food photographs that make you feel as though you are sitting at the table with the food right in front of you.
The only way you'll find what works best is to play around. Stand on a (steady) chair for an overshot or crouch down to capture that cocktail. You'll never know what works best until you try it! And that's the beauty of digital photography - you can erase what you don't like.
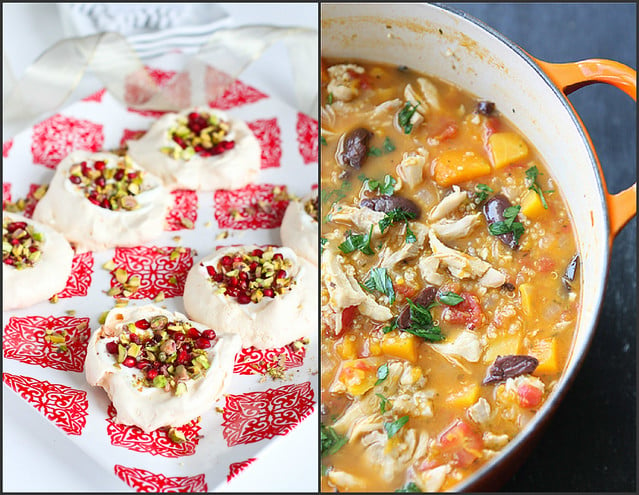
Light Meringues with Pomegranate & Pistachios and Hearty Chicken Stew with Butternut Squash & Quinoa
#4: Play around with Depth of Field
If you are unfamiliar with "depth of field", imagine some of those beautiful photos you've seen in your favorite food magazine or cookbooks. The "main event" is in focus in the foreground while the background is beautifully blurred and almost ethereal looking.
All DSLR cameras have the option of changing the aperture, which affects the depth of field of the photo (read your camera manual for more details). If you are using a point and shoot camera, there are some tips and tricks outlined in this article to help you achieve the same effect. If you're shooting with a smart phone, don't despair, there are several camera apps available, such as Big Lens, that allow you to adjust the aperture and shutter speed.
Here are two examples of depth of field being used in different ways:
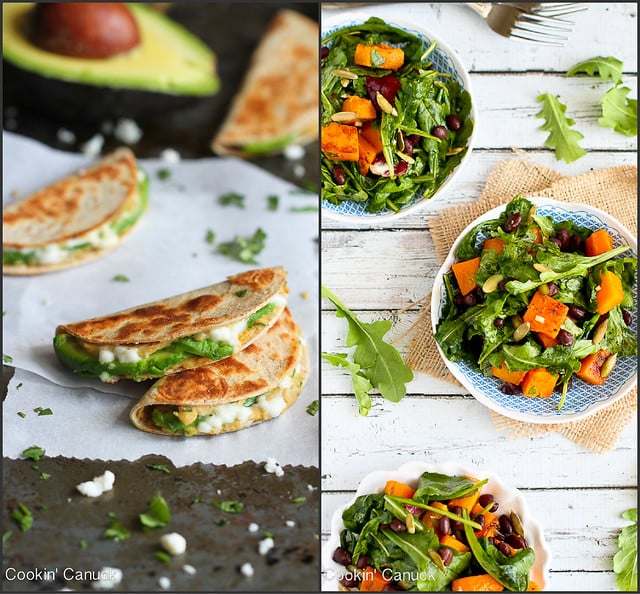
Mini Avocado & Hummus Quesadillas and Roasted Butternut Squash Salad with Sriracha Lime Dressing
#5: Simplify
Wouldn't it be cool to include some garland in the Christmas cookie photo? And what about Grandma's set of glass ornaments? And that cute reindeer figurine from the mantelpiece?
Whoa there, Nellie! While it's a nice touch to include some momentos into the background, often less is more. Instead of including all of Grandma's glass ornaments, perhaps you could just choose your favorite one?
Along the same lines, clean up the clutter in the background. Clear the extra plates and cooking utensils out of photo, and let there be some negative (blank) space. This will help your eye travel to the main focus of the picture.
#6: Everybody focus, please!
When I scroll back through my old food photos, I realize that I had some serious issues with focusing my camera. I now know that this was because I didn't really understand how to use my camera properly. If you're uncertain about your camera's features, spend a few minutes flipping through that section of the manual. Those few minutes may result in photos that are much crisper than ones you've taken in the past.
If you are shooting on a lower shutter speed (in other words, the time between pressing the shutter and the final click is longer), the photo is likely to be blurry. If you are familiar with the manual mode of your camera, by all means play around with the ISO, aperture and shutter speed to achieve the correct effect without any blur. If manual mode seems daunting, then consider using a tripod to steady the camera.
#7: Post process
You've taken the photo at several different angles, played around with the depth of field and used garnishes to your heart's desire. Now what?
This is where a little photo nip and tuck comes into play. In other words, it's time to pull out some tools in Photoshop Elements to make changes to exposure, saturation, sharpness and so on.
Adobe Photoshop Elements is fantastic for any level of post-process, from the most basic to mind-blowing adjustments. In this example, I'm going to show you how to use the "Quick" setting to make some pretty significant changes to a photo.
In this sequence of photos, the "before" photo is on the left and the "after" photo is on the right. Follow along as I make some basic changes to the photo, using just the exposure, saturation, sharpening and cropping tools. The whole process took about 2 minutes and the changes are a noticeable improvement.
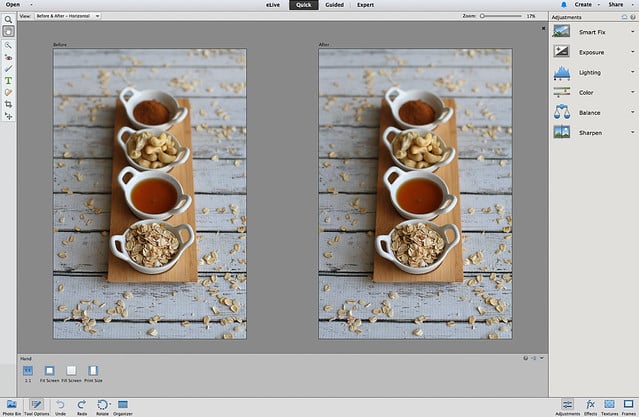
Set up the "Before and After" view in the Quick edit mode.
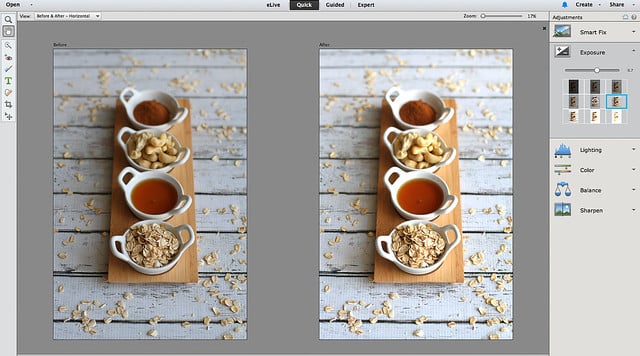
Increase the exposure on the sliding scale until it suits your eye. Using the individual sliding scales, adjust the saturation, color (saturation and hue), white balance and sharpness.
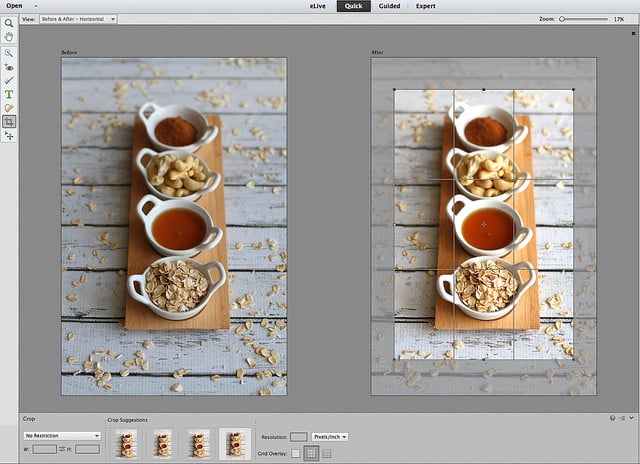
The crop tool will provide several different crop suggestions. Choose one of the suggestions, or adjust based on your specifications.
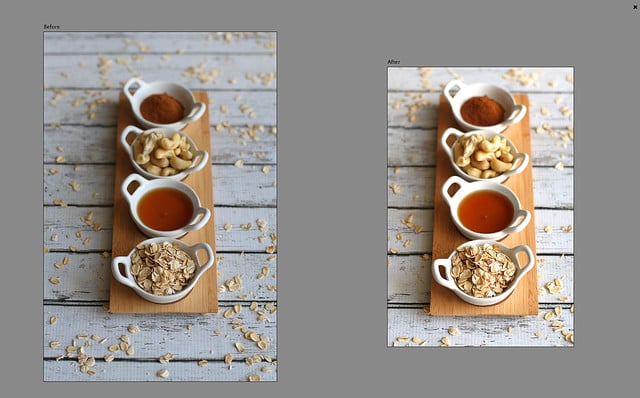
Voilà! Before and after in under two minutes!
Now that you have some basic tips and tricks on your side, it's time to start shooting. Practice really does make perfect, so snap away to your heart's content!
Disclosure: This post was sponsored by Adobe. All opinions are my own.


Nikki+@+NikSnacks
Thank you SO much for your tips! I've discovered that my BATHROOM has the best light in my house! haha!
Aggie
I need to get a tripod. These tips are great Dara! I don't play with the crop tool enough either. Always learning...
Your pictures are fantastic!! I want to fly you down to florida for a private photo learning session 😉
Donna
Just forwarded this link to The Hubs - thanks, Dara!
Kim+(Feed+Me,+Seymour)
I think food photography can be a challenge, from beginning to end. And there is always more to learn even after you think you've mastered it! I love these tips and definitely bookmarked a few to try with my photos!
Bea
Great tips - thank you so much, Dara.
Erin+@+Texanerin+Baking
Such great tips! I didn't know about the before and after thing. I'll have to try that! Thanks so much. 🙂
Heather+|+girlichef
Awesome, awesome tips Dara! I'm going to go ahead and admit something - even though I take photos on a daily basis, I'm still scared of manual mode. Saving this for reference. 🙂
Lauren+@+Healthy+Delicious
Great tips! Although I want to cry every time I see the tip to use natural light. Even in the summer when the sun is still up at dinner time, my house is crazy dark! 🙁
Nutmeg+Nanny
Such great tips! I'm a huge fan of natural light (when the sun wants to come out!) but I always suffer with styling. I'm simply by nature so sometimes I try to break out of my mold and try something new.
Angela+{Mind+Over+Batter}
Photography is my Lex Luthor. It's my least favorite part of the whole blogging process. You have wonderful tips here Dara! I've been considering upping my post editing software game (currently use a free online tool), and I plan to add Photoshop Elements to my santa list!