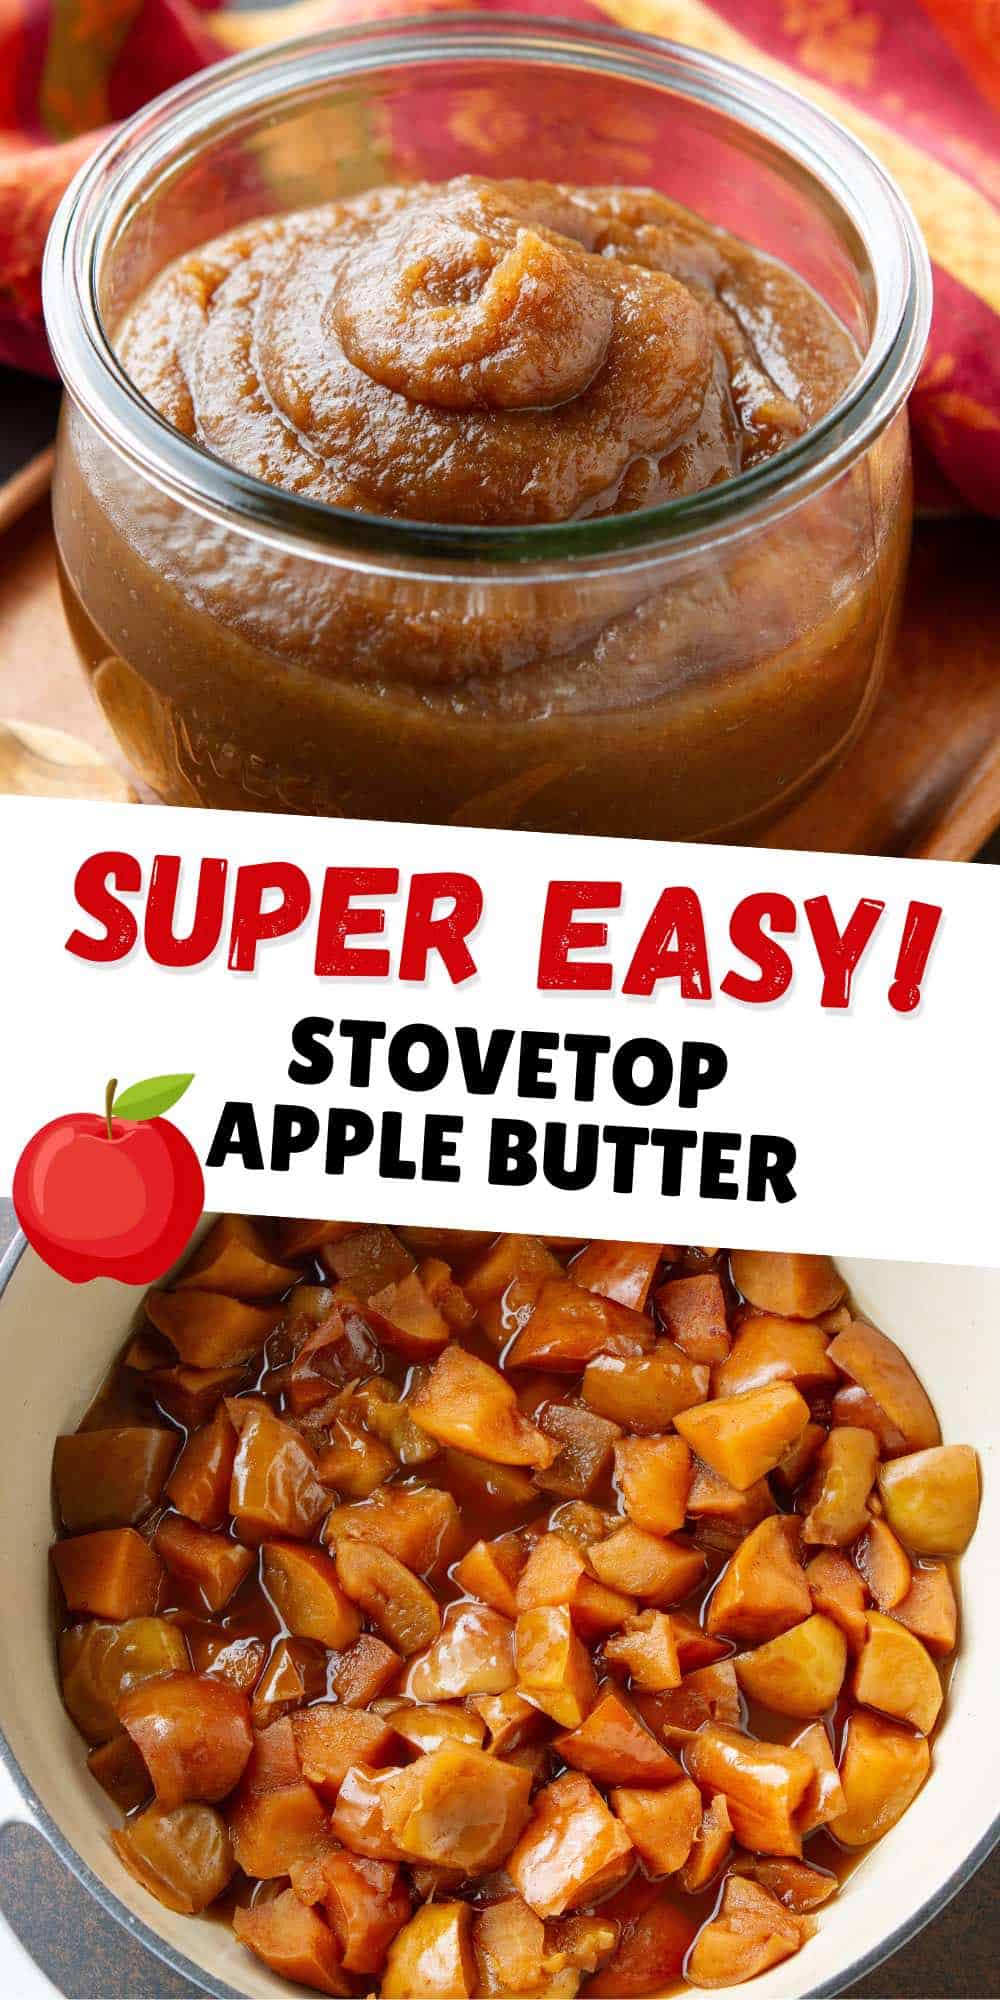
Stovetop apple butter is everything that's right with autumn. This homemade version is sweetened with maple syrup and richly flavored with fall spices. Spread it on sandwiches, use it as an accompaniment for meat or incorporate it into baking or breakfast dishes.

Stovetop apple butter if one of my favorite fall treats. Now, I know what you're thinking – "Apple butter? That sounds like a lot of work!" But fear not, because I'm here to guide you through this delicious journey without breaking a sweat.
In the realm of homemade condiments, few are as quintessentially autumnal as homemade apple butter. This versatile spread, combining sweet apples, spices and maple syrup, is a kitchen staple worth adding to your repertoire. With a few simple steps and a bit of patience, you'll be rewarded with a rich, velvety concoction that's equally at home on your morning toast as it is alongside savory dishes like roasted turkey. Or spread it on a grilled turkey sandwich.
Many apple butter recipes include copious amounts of brown sugar. In contrast, this recipe relies on the natural sweetness of the apples, enhanced by just a ¼ cup of pure maple syrup.
Jump to:
What's the difference between applesauce and apple butter?
Applesauce is a simple, lightly sweetened puree of cooked apples, maintaining a smooth and slightly chunky texture. It’s a versatile accompaniment, often enjoyed as a snack or a healthy side dish.
In contrast, apple butter is a more concentrated and spiced spread. It's cooked for a longer duration, allowing the apples to caramelize and darken, resulting in a richer, deeper flavor with warm, comforting spices like cinnamon, nutmeg, and cloves. It is thicker, closer to a fruit preserve, and serves as a flavorful condiment.
Choosing the right apples
The apple variety you select will impact the flavor, texture, and sweetness of the final product.
I used Fuji apples because they have a fantastic flavor for applesauce or apple butter. Sweet, but not too sweet, and the texture is on the softer side. Plus, they were on sale (always a bonus!)
For my Instant Pot Applesauce and Crockpot Applesauce recipes, I use a combination of Gala and Yellow Delicious apples. This combo works well for apple butter, too. Other good options are Cortland, Braeburn and McIntosh apples.
If you like a hint of tartness, add a Granny Smith apple or two to balance out the sweeter apples.
KEEP IN TOUCH
and receive recipes straight to your inbox!

See recipe card below for full ingredients list & recipe directions.
Too thick or too thin
If the apple butter is a bit thicker than you like, thin it out with a little apple juice or water until it reaches your desired consistency. Conversely, if it's too thin, you can continue to cook it uncovered for a bit longer to allow excess moisture to evaporate and thicken it up.
How to make stovetop apple butter
PREP THE APPLES: Don't worry about peeling the apples or making perfect little apple cubes. Chunky pieces, approximately 1- to 1 ½- inch in size, are your friends here.
SPICE IT UP: Place the apples in a bowl, and add the maple syrup, cinnamon, nutmeg, ground cloves, salt and lemon juice. Give it a good stir to coat the apples.
COOK THE APPLES: Cooking the apples is all about patience. Pour some water into a large saucepan (I use my Dutch oven) and add the apples. Bring the liquid to a boil over medium-high heat, then reduce the heat to medium-low. Cover the saucepan and cook until the apples are soft, stirring occasionally. This should take about 2 hours. The apples should be soft enough to smash with the back of a fork.


PUREE: If you have an immersion blender, use it to blend the apple mixture until very smooth.
**IMPORTANT: Make sure that the immersion blender head is completely submerged in the apple mixture before turning it on. Otherwise, the hot mixture will splatter. You don’t want to be in the line of fire!
Alternatively, use a regular blender. Please be cautious when blending hot mixtures in a regular blender. Allow it to cool slightly, and blend in batches if necessary.
THICKEN AND BROWN: After pureeing the apples, continue cooking the puree, with the pot lid ajar, until it transforms into a gorgeous, dark golden brown apple butter. This is where the magic happens, and it can take another hour.
Make-Ahead and Storage
Stovetop apple butter can be made in advance and stored in an airtight container in the refrigerator for up to a few weeks.
If you've made a big batch and won't use it all within a few weeks, consider freezing some for later – it holds up beautifully in the freezer.
To freeze apple butter, allow it to cool to room temperature, then transfer to a freezer-friendly airtight container. Freeze it for up to 1 year. Defrost it in the fridge.
What to serve it with
Apple butter can do double duty – it's not just a spread! Here are a few ideas:
Condiment: Serve it with roast pork, turkey or chicken.
Breakfast: Mix it with yogurt and granola for a simple breakfast, or dollop it onto baked oatmeal. It’s also great on toast or as a topping for pancakes (awesome with pumpkin pancakes!)
Sandwich: Ditch the mayo and mustard, and try apple butter instead. My family loves it in turkey Cheddar panini or on a grilled turkey sandwich.
Dessert: It makes a fantastic filling for turnovers, muffins, and even as a topping for ice cream.

Frequently Asked Questions:
Absolutely! Follow proper canning procedures to ensure your apple butter stays safe for months.
Sure, but be cautious when blending hot mixtures in a regular blender. Allow it to cool slightly, and blend in batches if necessary.
You can absolutely make a smaller batch if you don't need a large quantity of apple butter. Simply adjust the quantities of ingredients accordingly, but keep in mind that the cooking times may vary slightly, so keep an eye on it as it cooks.
Other Recipes You'll Love
If you make this recipe, please let me know! Leave a star rating ⭐️⭐️⭐️⭐️⭐️ and comment underneath the recipe card below. Thank you!
Printable Recipe

Stovetop Apple Butter
Ingredients
- 4 pounds apples (See Note 1 for varietal suggestions)
- ¼ cup pure maple syrup (See Note 2)
- 1 ½ tablespoons fresh lemon juice
- 1 ½ teaspoons ground cinnamon
- ½ teaspoon grated or ground nutmeg
- ¼ teaspoon ground cloves
- ¼ teaspoon kosher salt
- ½ cup water
Instructions
- Do not peel the apples. Cut out the core and cut the apples into 1- to 1 ½-inch chunks. Transfer to a bowl.
- Add the maple syrup, lemon juice, cinnamon, nutmeg, cloves and salt to the apples. Stir to thoroughly coat the apples.
- Pour the water into the bottom of a large saucepan. Add the apples to the pot.
- Bring the liquid to a boil over medium-high heat, then reduce the heat to medium-low. Cover the saucepan and cook, stirring occasionally, until the apples are very soft. This will take about 2 hours. The apples should be soft enough to smash with the back of a fork.
- Remove the saucepan from the heat. Use an immersion blender to puree the apple mixture until very smooth. (IMPORTANT! Make sure that the immersion blender head is completely submerged in the apple mixture before turning it on. Otherwise, the hot mixture will splatter. You don’t want to be in the line of fire!) Alternatively, use a regular blender. Please be cautious when blending hot mixtures in a regular blender. Allow it to cool slightly, and blend in batches if necessary.
- Continue to cook the apple puree over medium-low heat, with the lid of the saucepan ajar. The lid stops the apple butter from splattering over your stovetop. However, it should be ajar to allow the steam to escape so the apple butter thickens.
- Simmer, stirring occasionally, until the apple butter is thickened and deep golden brown.
- Cool, then serve or store in an airtight container in the refrigerator.
Video
Notes
Nutrition
Disclosure: I am a participant in the Amazon Services LLC Associates Program, an affiliate advertising program designed to provide a means for me to earn fees by linking to Amazon.com and affiliated sites.



Rose
I love apple butter and I love to cook thank you